
How to Use the Application
Quick Start
- General Information
- Logging In
- Choosing a Language
- Creating an Operation
- Posting an Operation
- Accounting Entries
- Generating Reports
- Logging Out
General Information
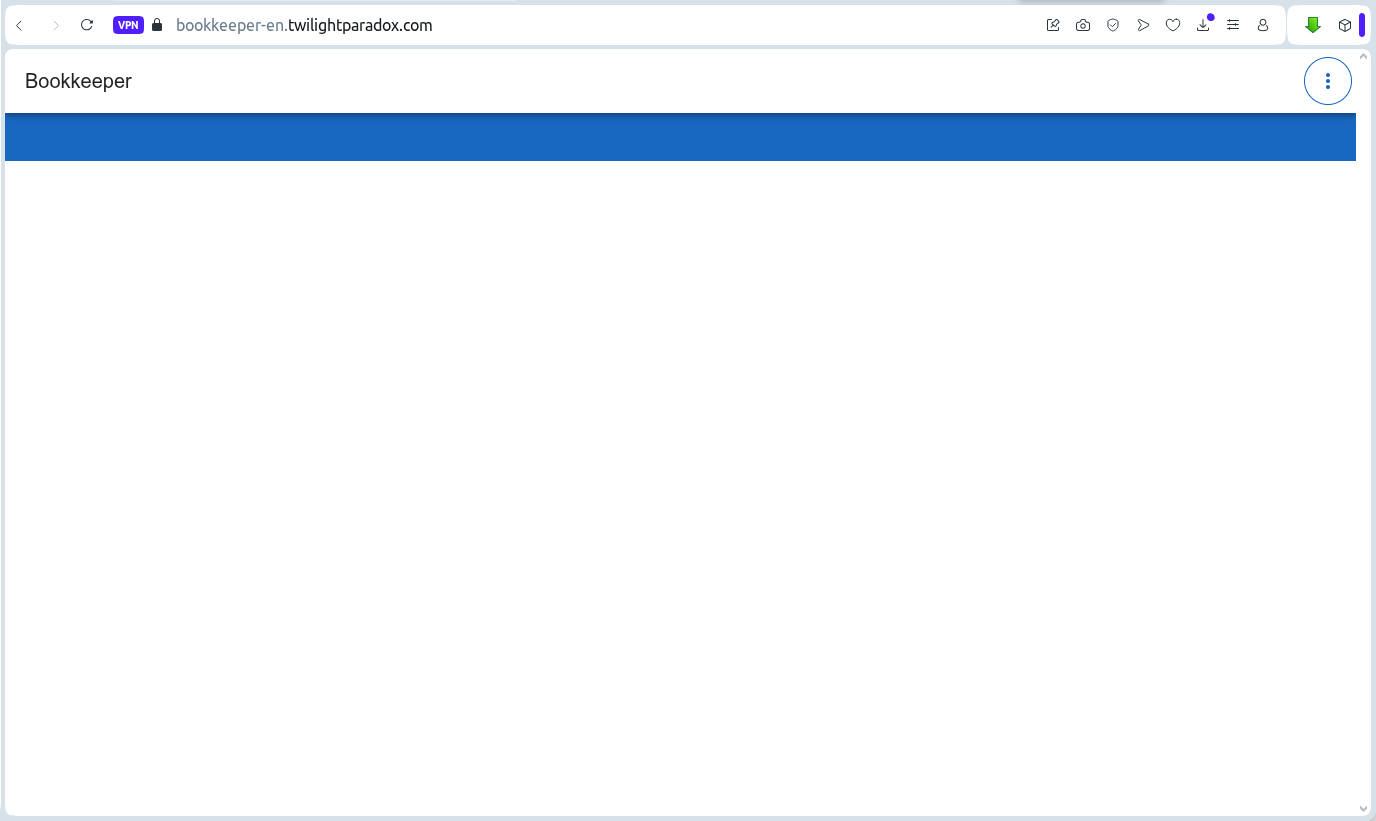
To use the application, you only need a computer with a web browser installed and an internet connection.
If your country has a state-level firewall that blocks access to some websites (for example, in Turkey), the application page might not open.
In this case, you can use any VPN service or the Opera browser
![]() ,
which has its own built-in free VPN. Enable the VPN mode and go to the address where the Bookkeeper application is deployed.
,
which has its own built-in free VPN. Enable the VPN mode and go to the address where the Bookkeeper application is deployed.
Logging In
If you managed to open the website, you need an active account (configured through the site admin panel) consisting of a username and password to start using the app.
If the user is not authenticated, they will see a login window.
For demo database versions, use the username test with the password test.
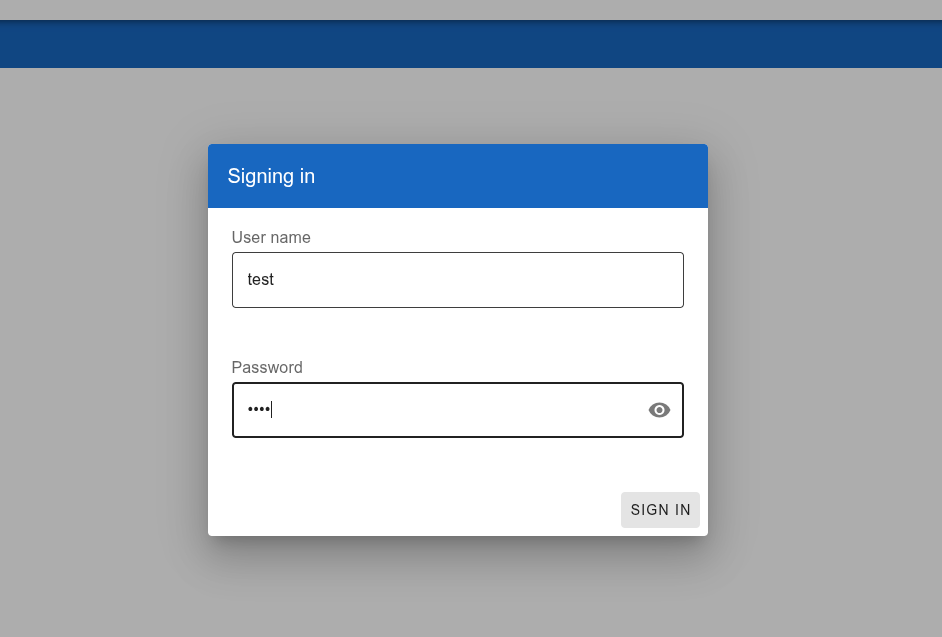
If the username and password are entered correctly, the system will load without the login window, meaning you can start working.
Choosing a Language
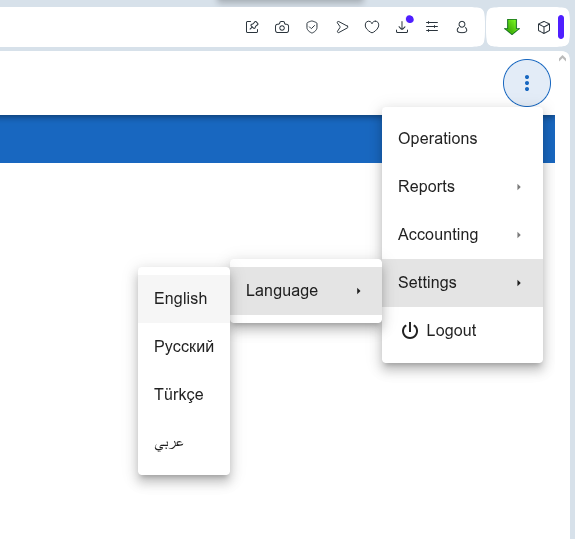
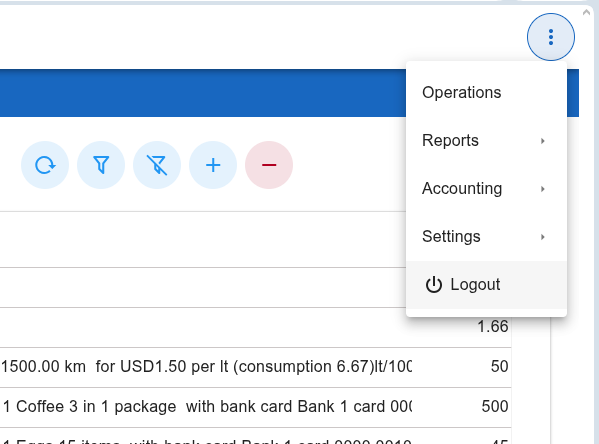
The application is initially configured to open in the same language as this page. If you want to change the interface language, you can choose one of the built-in languages from the menu.
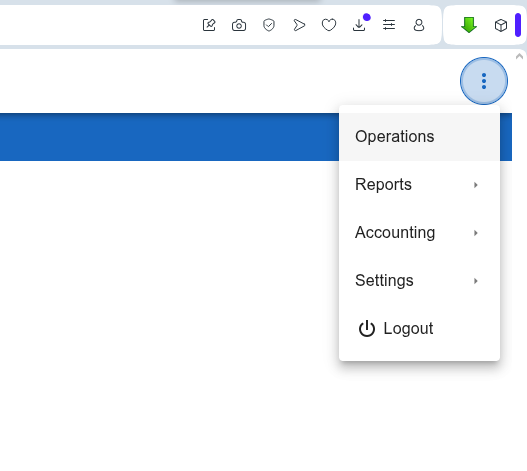
The menu is activated with a round button containing three dots, located in one of the top corners of the application.
Then select, for example, “Settings ⇒ Language ⇒ Russian”.
Creating an Operation
Now let’s create an operation — for example, buying groceries using a bank card.
To do this, go to the “Operations” menu.
Once the list of existing operations appears, click the button with a “plus” icon inside.

After that, a window will appear prompting you to choose the desired operation type.
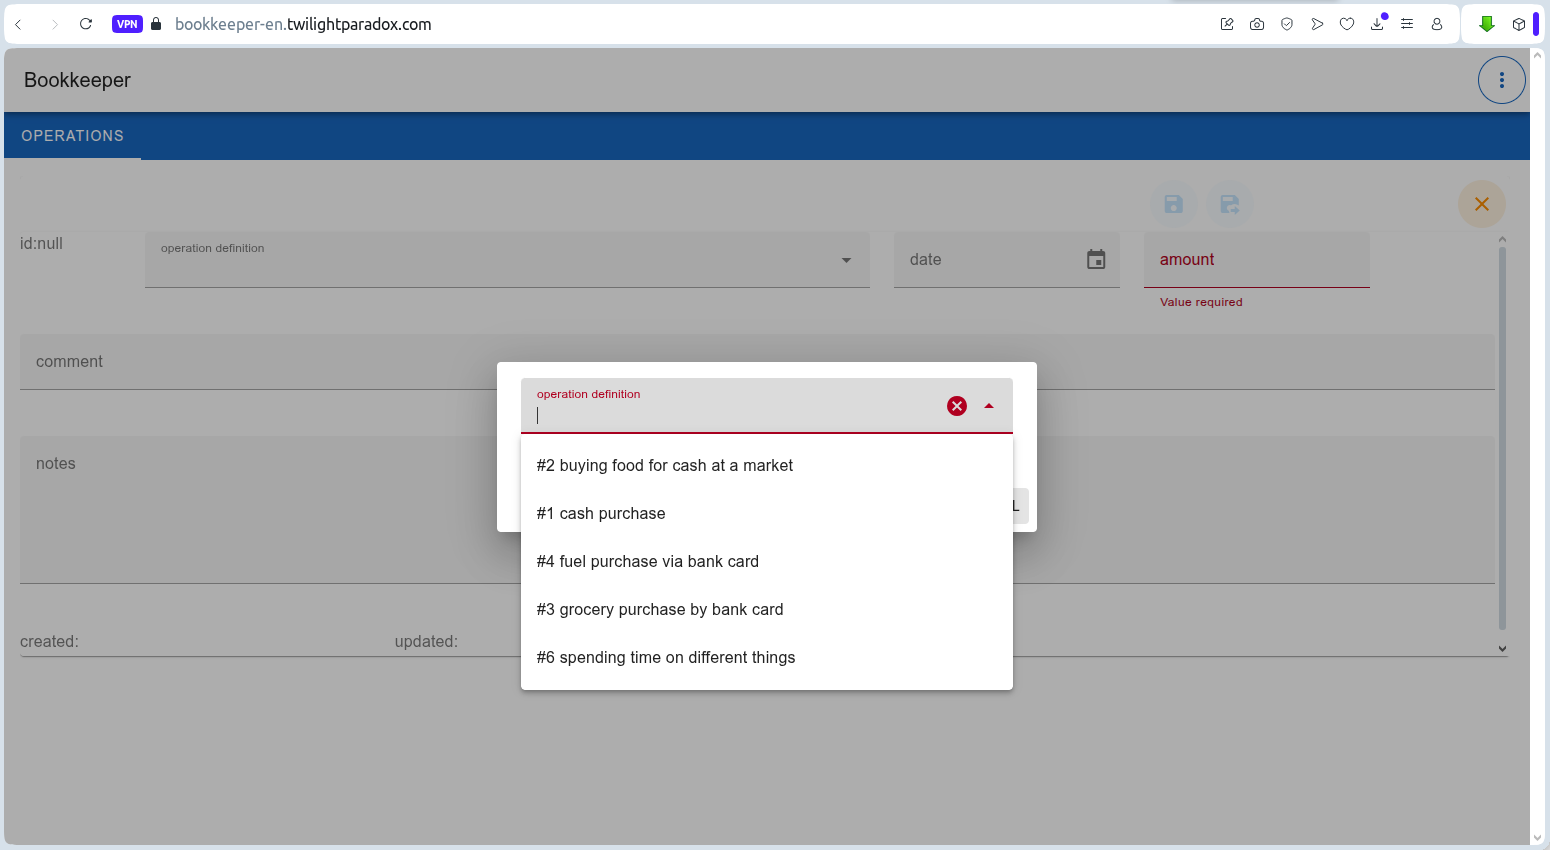
For example, we’ll select the type “grocery purchase by bank card”.
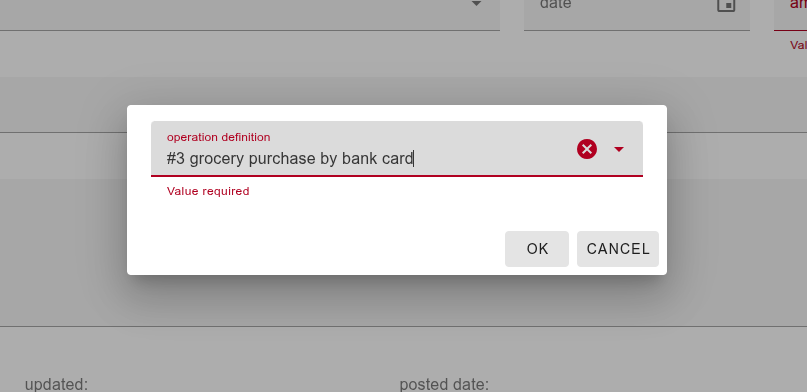
Once the operation type is selected, all parameters specific to that type will be automatically loaded. You just need to fill in the required fields.
For example, this operation is configured in the admin panel to include two types of parameters: header parameters and position parameters (the same set of fields for each document line).
Let’s fill in the header fields first:
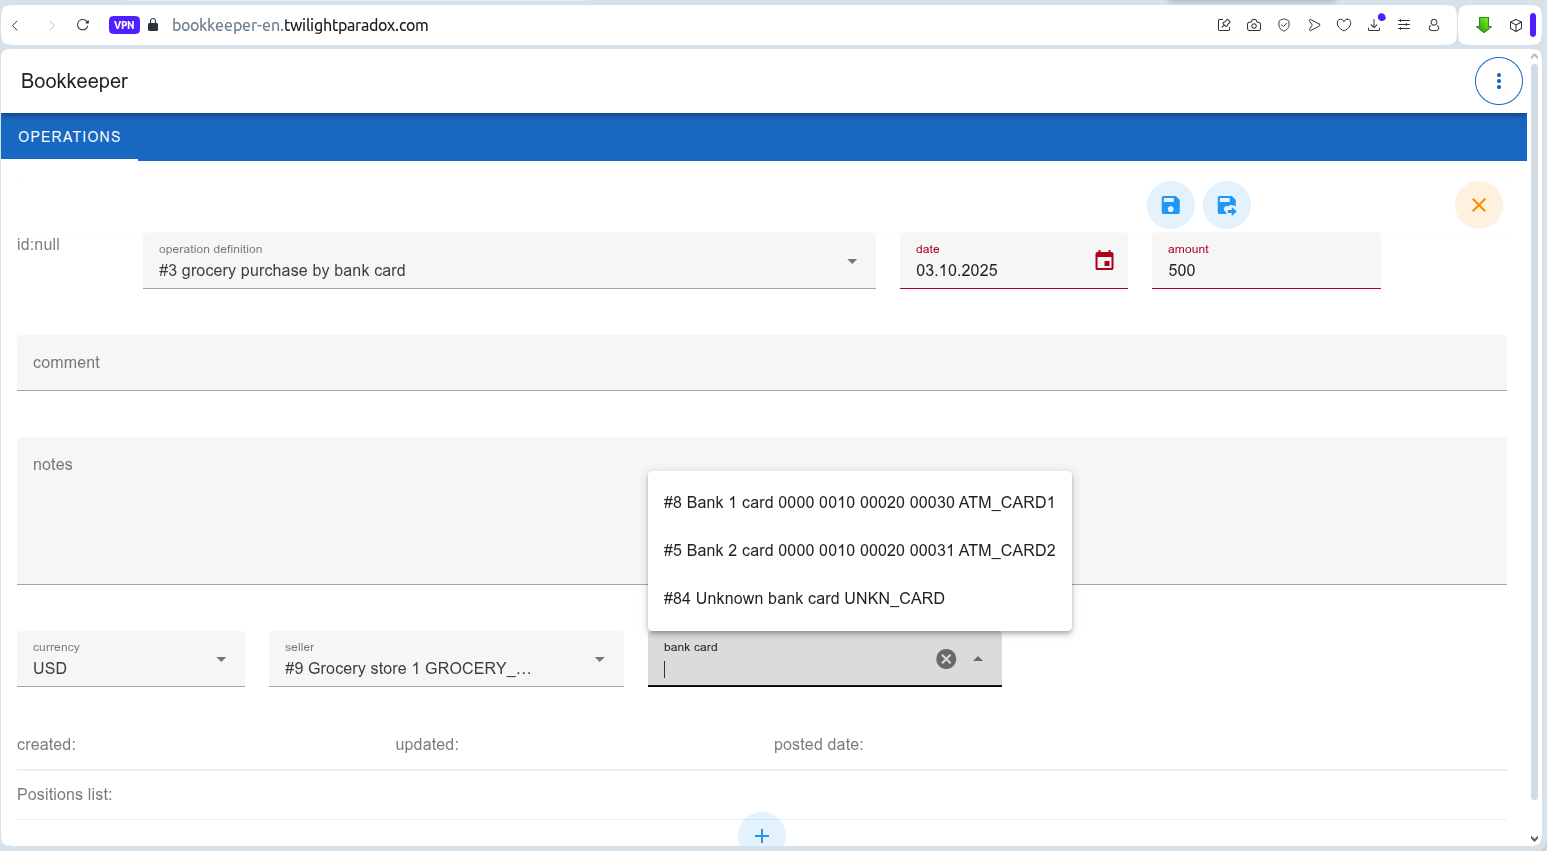
Then click the “Add position” button.
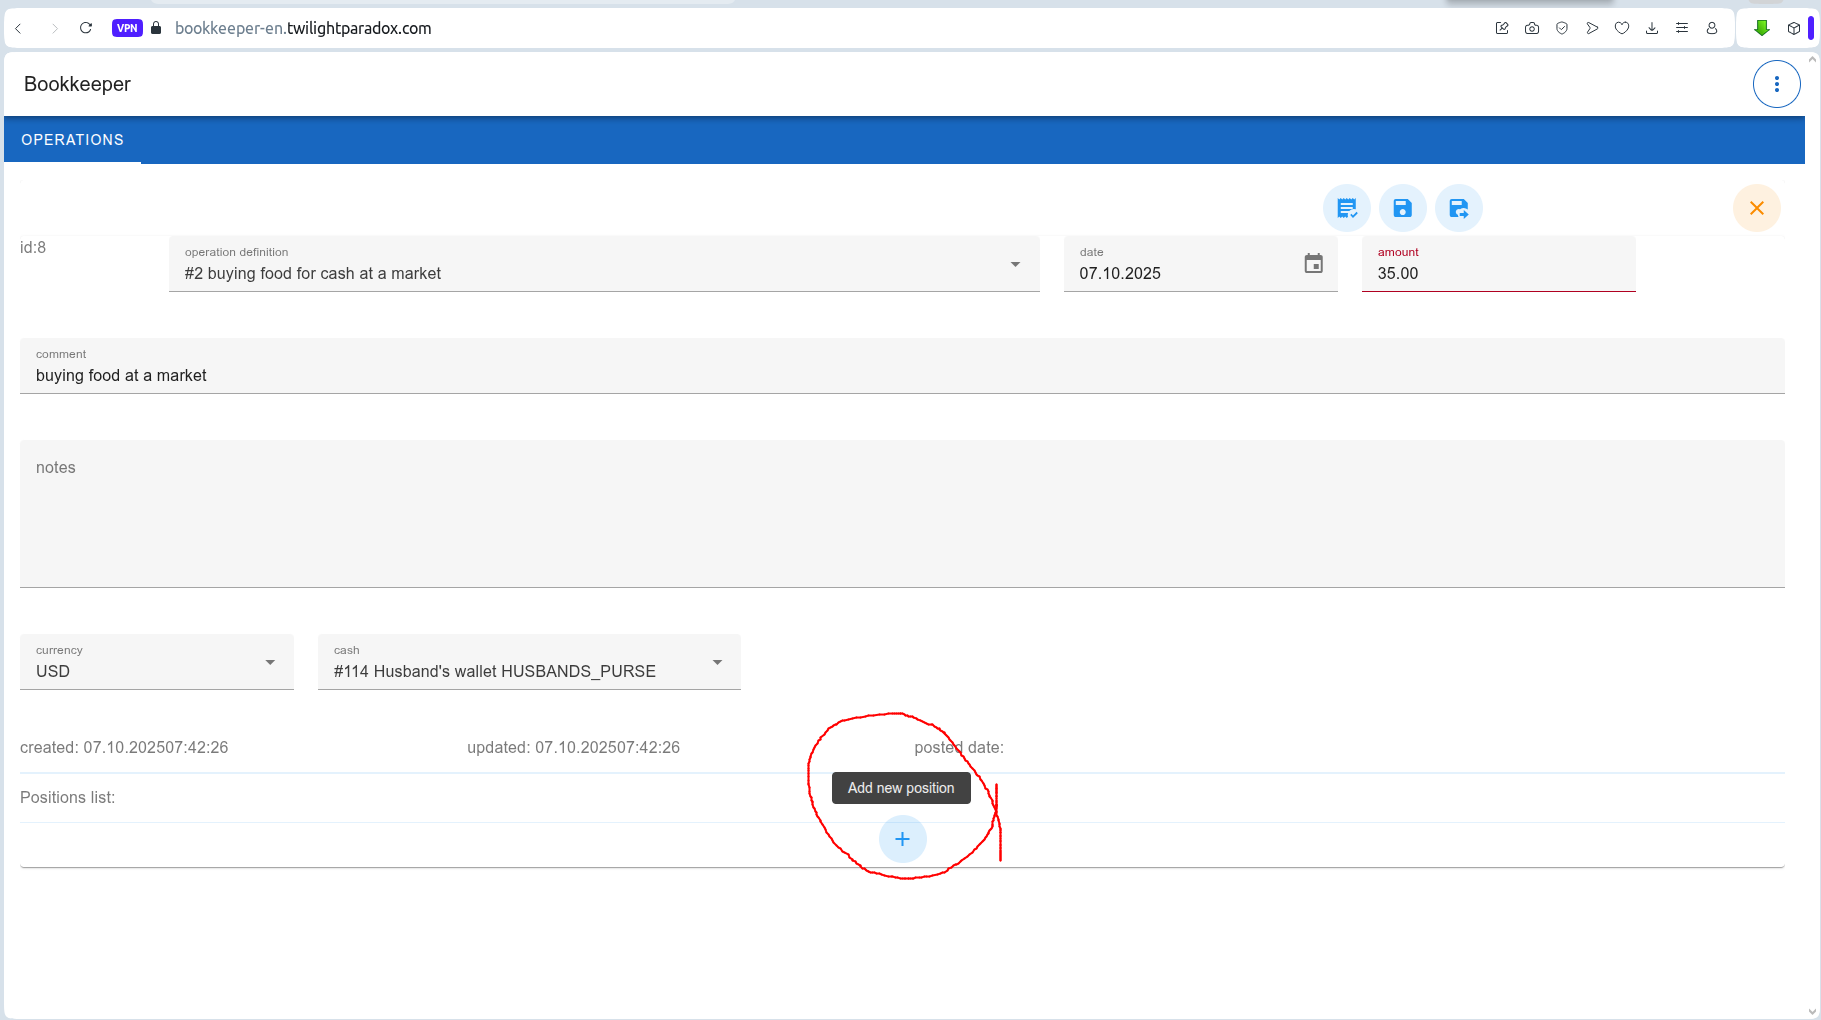
And start filling in the document positions:
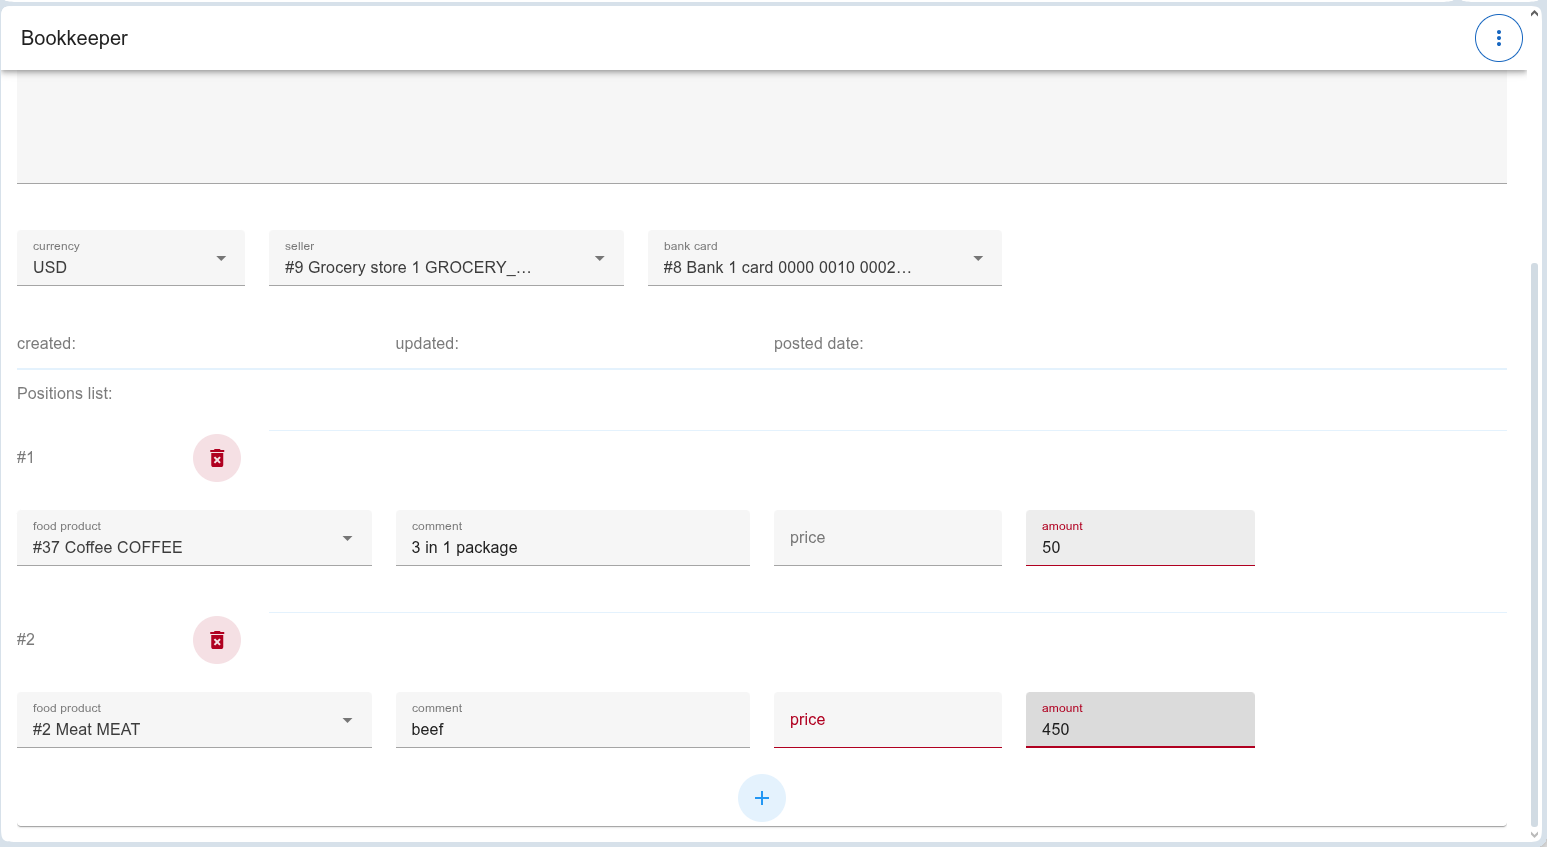
This operation is configured so that if the “comment” field is left empty, the built-in formula translator will automatically generate a comment text when the document is posted.
So we can skip that and just save the operation by clicking “Save”.
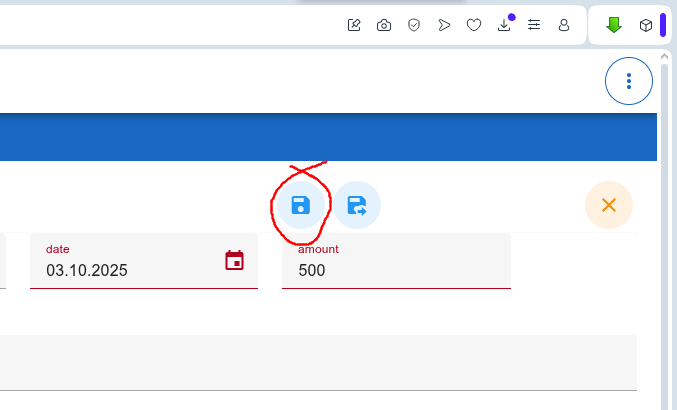
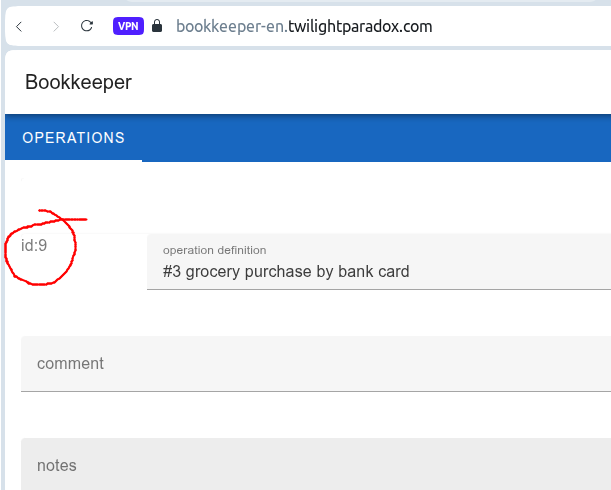
After saving, each operation receives its own unique ID number, which can later be used to filter the automatically created entries related to it.
Posting an Operation
Now that we have a saved operation, we can automatically create accounting entries. These entries appear in reports, so until the operation is posted, they won’t be included in reports.
To create entries, click the “Post” button inside the operation.
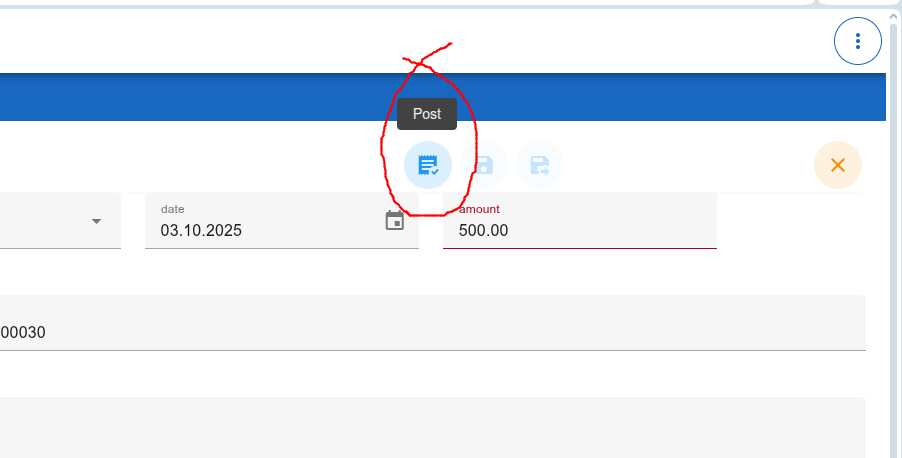
After posting, the “Post” button changes to a “Unpost” button.
Accounting Entries
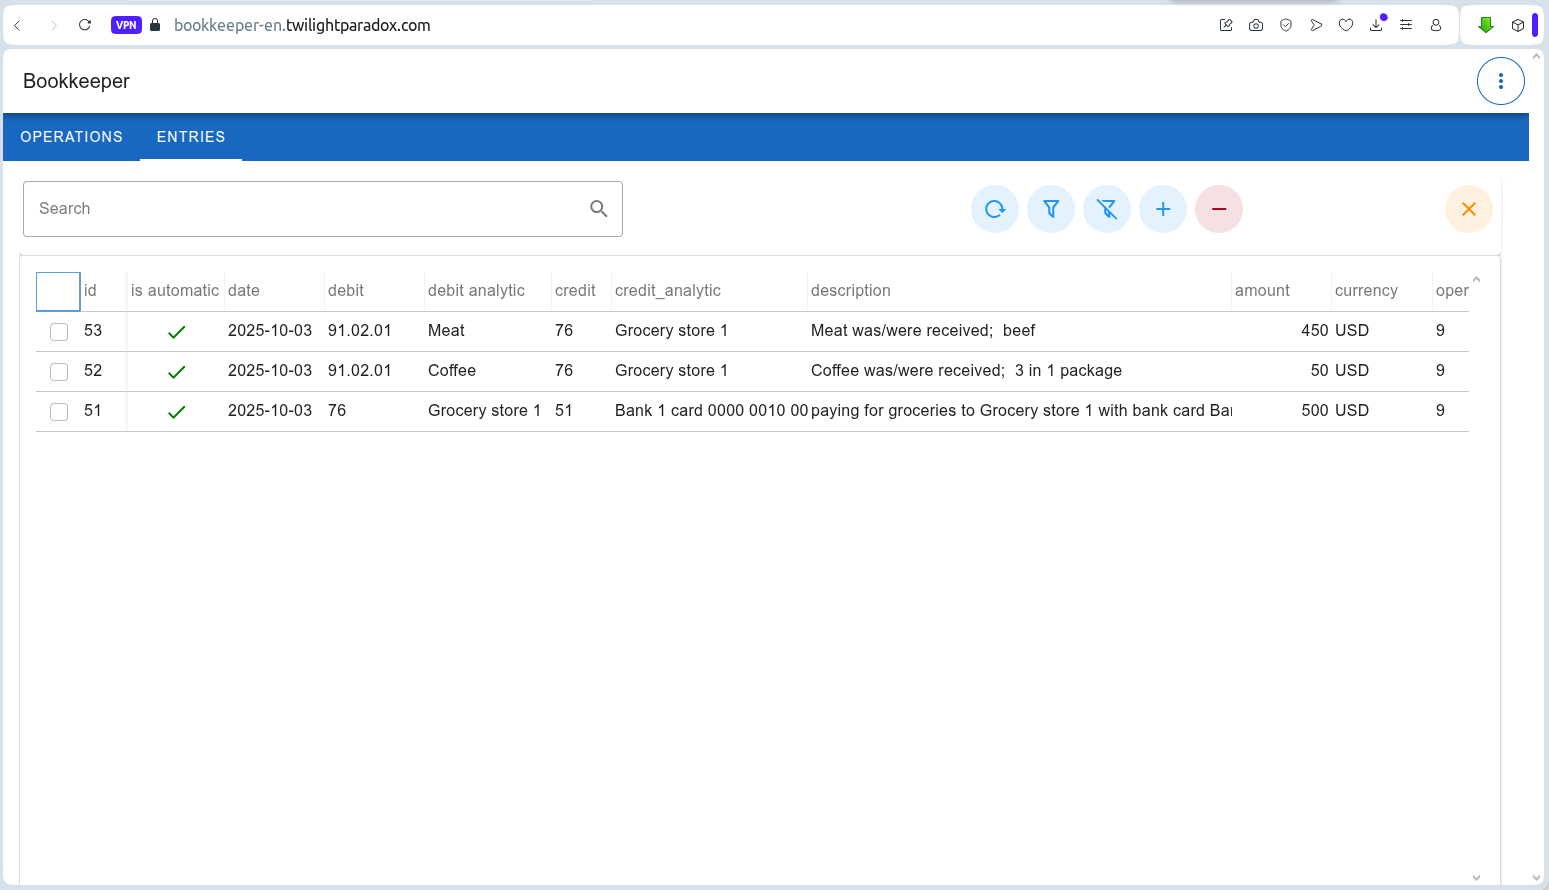
Let’s see what we’ve got as a result of our actions.
First, remember the operation number (in our case, it’s 9).
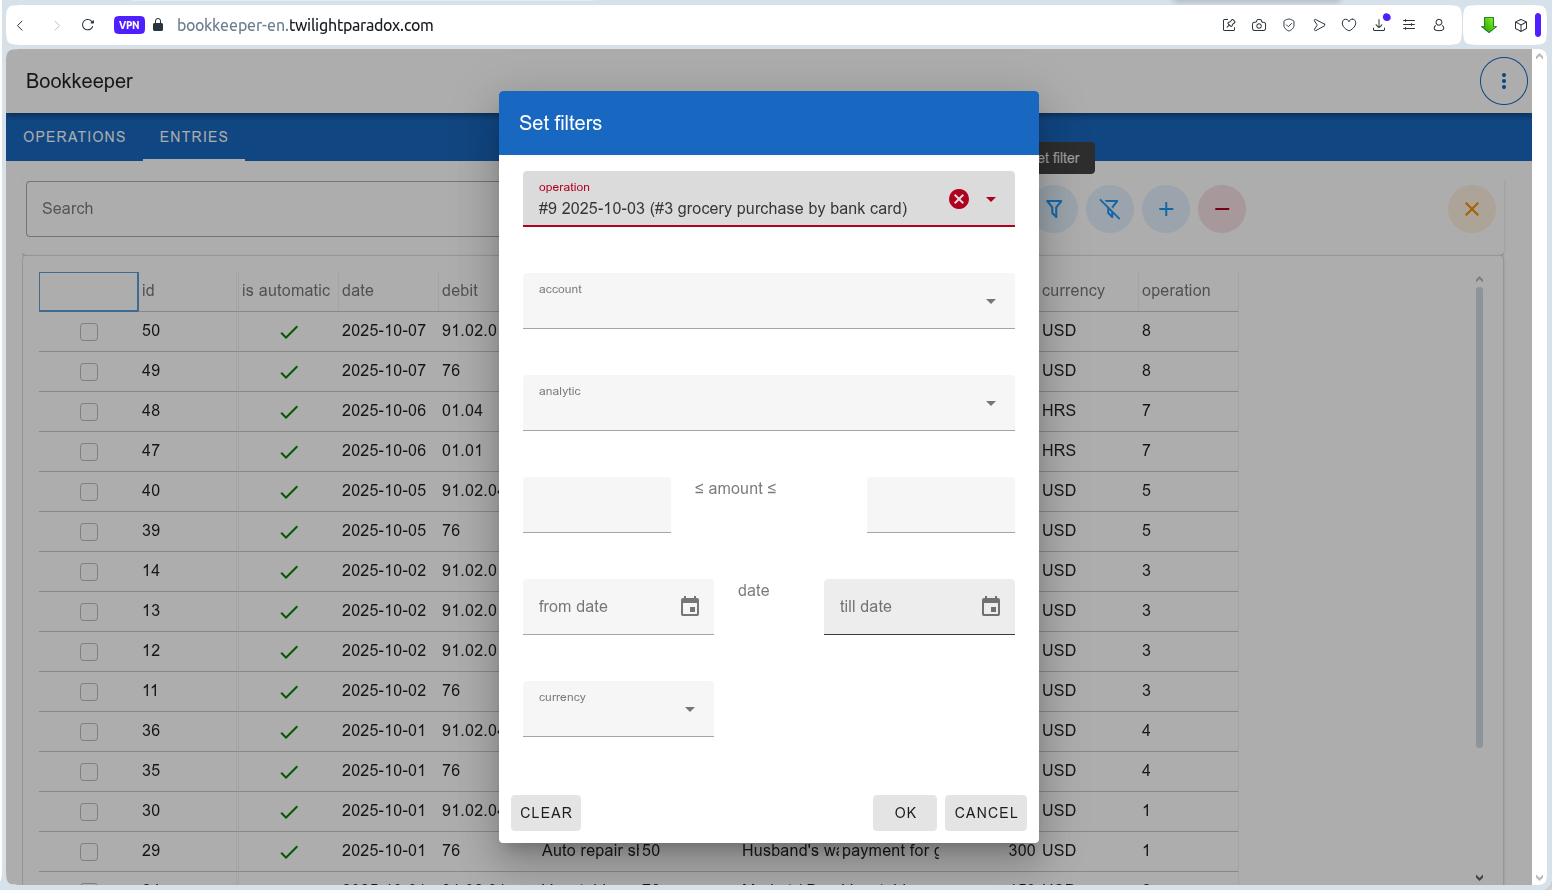
Go to the “Entries” table from the main application menu.
Once the entries table opens, filter them by the operation number:
As a result, we’ll see the entries created by the application.
Generating Reports
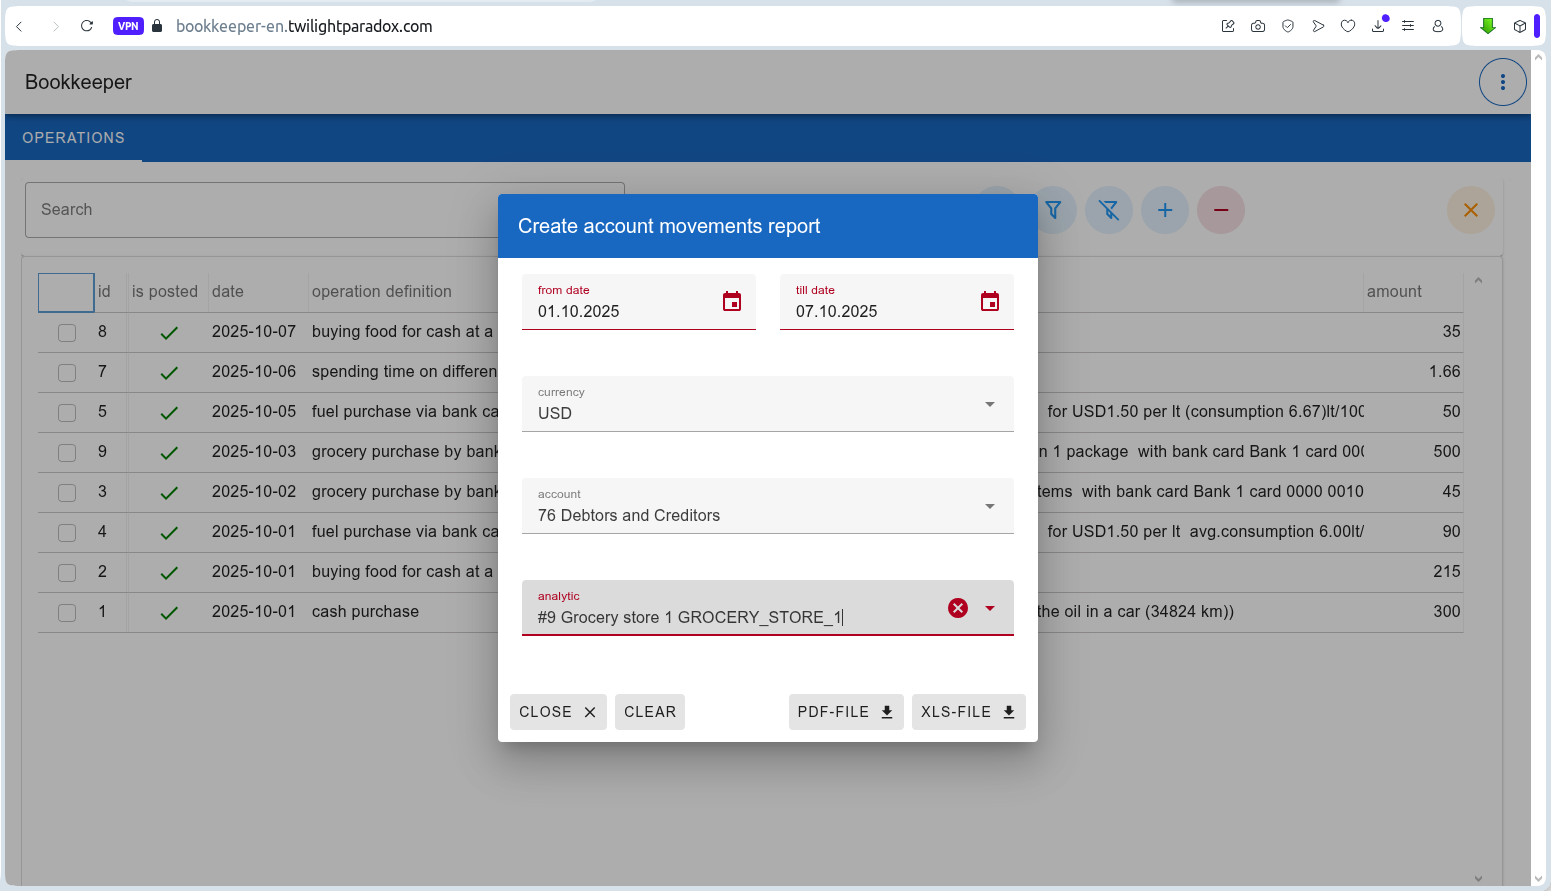
The application supports two types of reports: “Account Movements” and “Trial Balance”.
To generate a report, select the desired one from the main menu, fill in the parameters, and click “PDF” to download a PDF version or “XLS” to get an Excel spreadsheet.
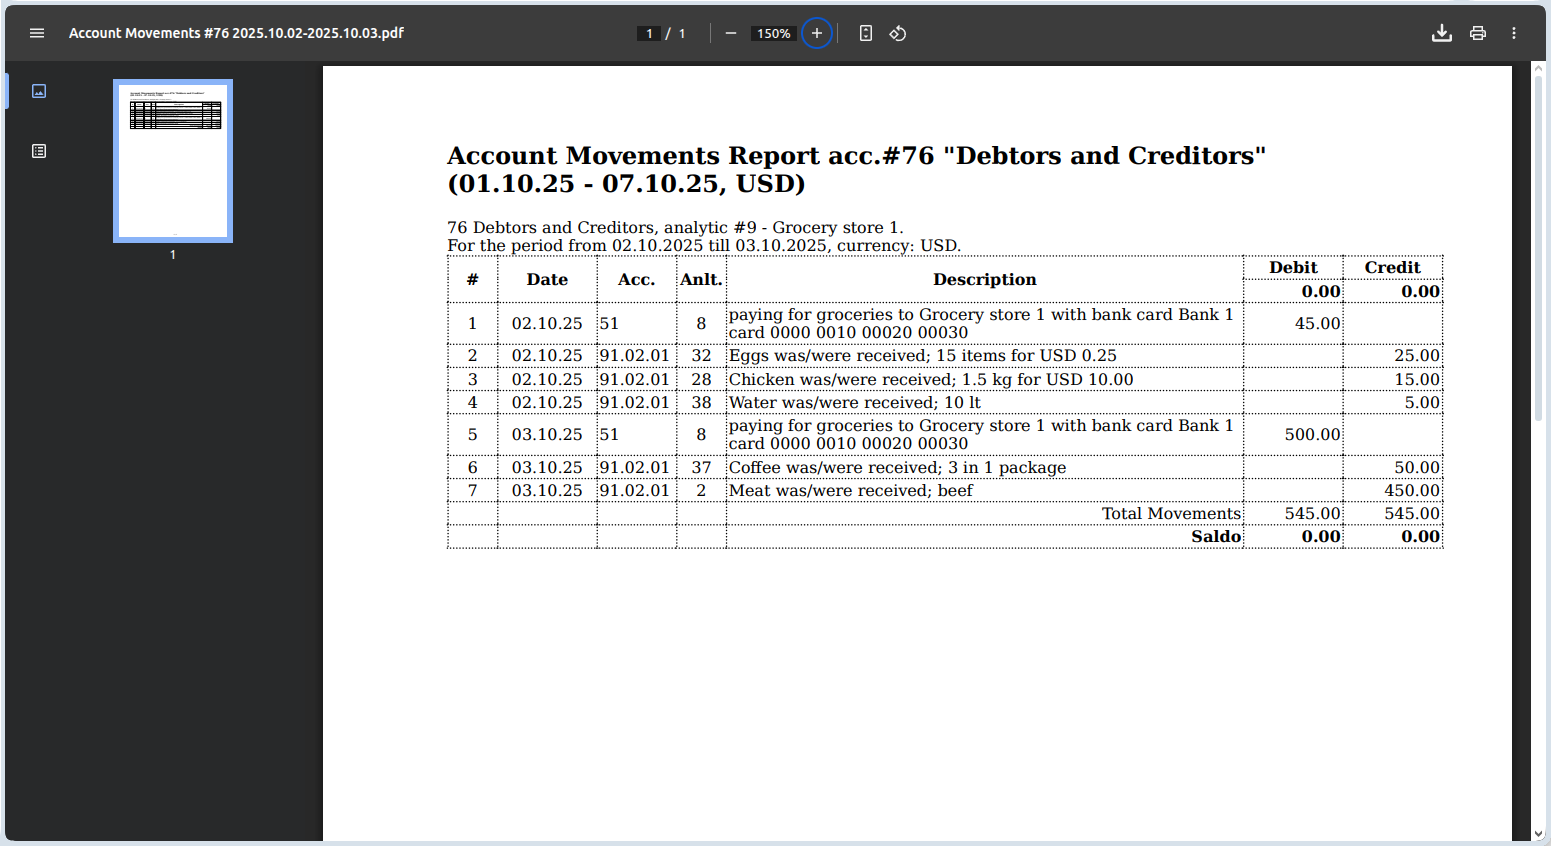
Here’s the result:
Logging Out
When you finish working with the application, it’s recommended (and mandatory if others have access to your device) to log out.
This can be done by choosing the “Logout” option in the main menu.
After clicking it, you will not be able to use the system until valid credentials are entered again.